
Chelsea Cape
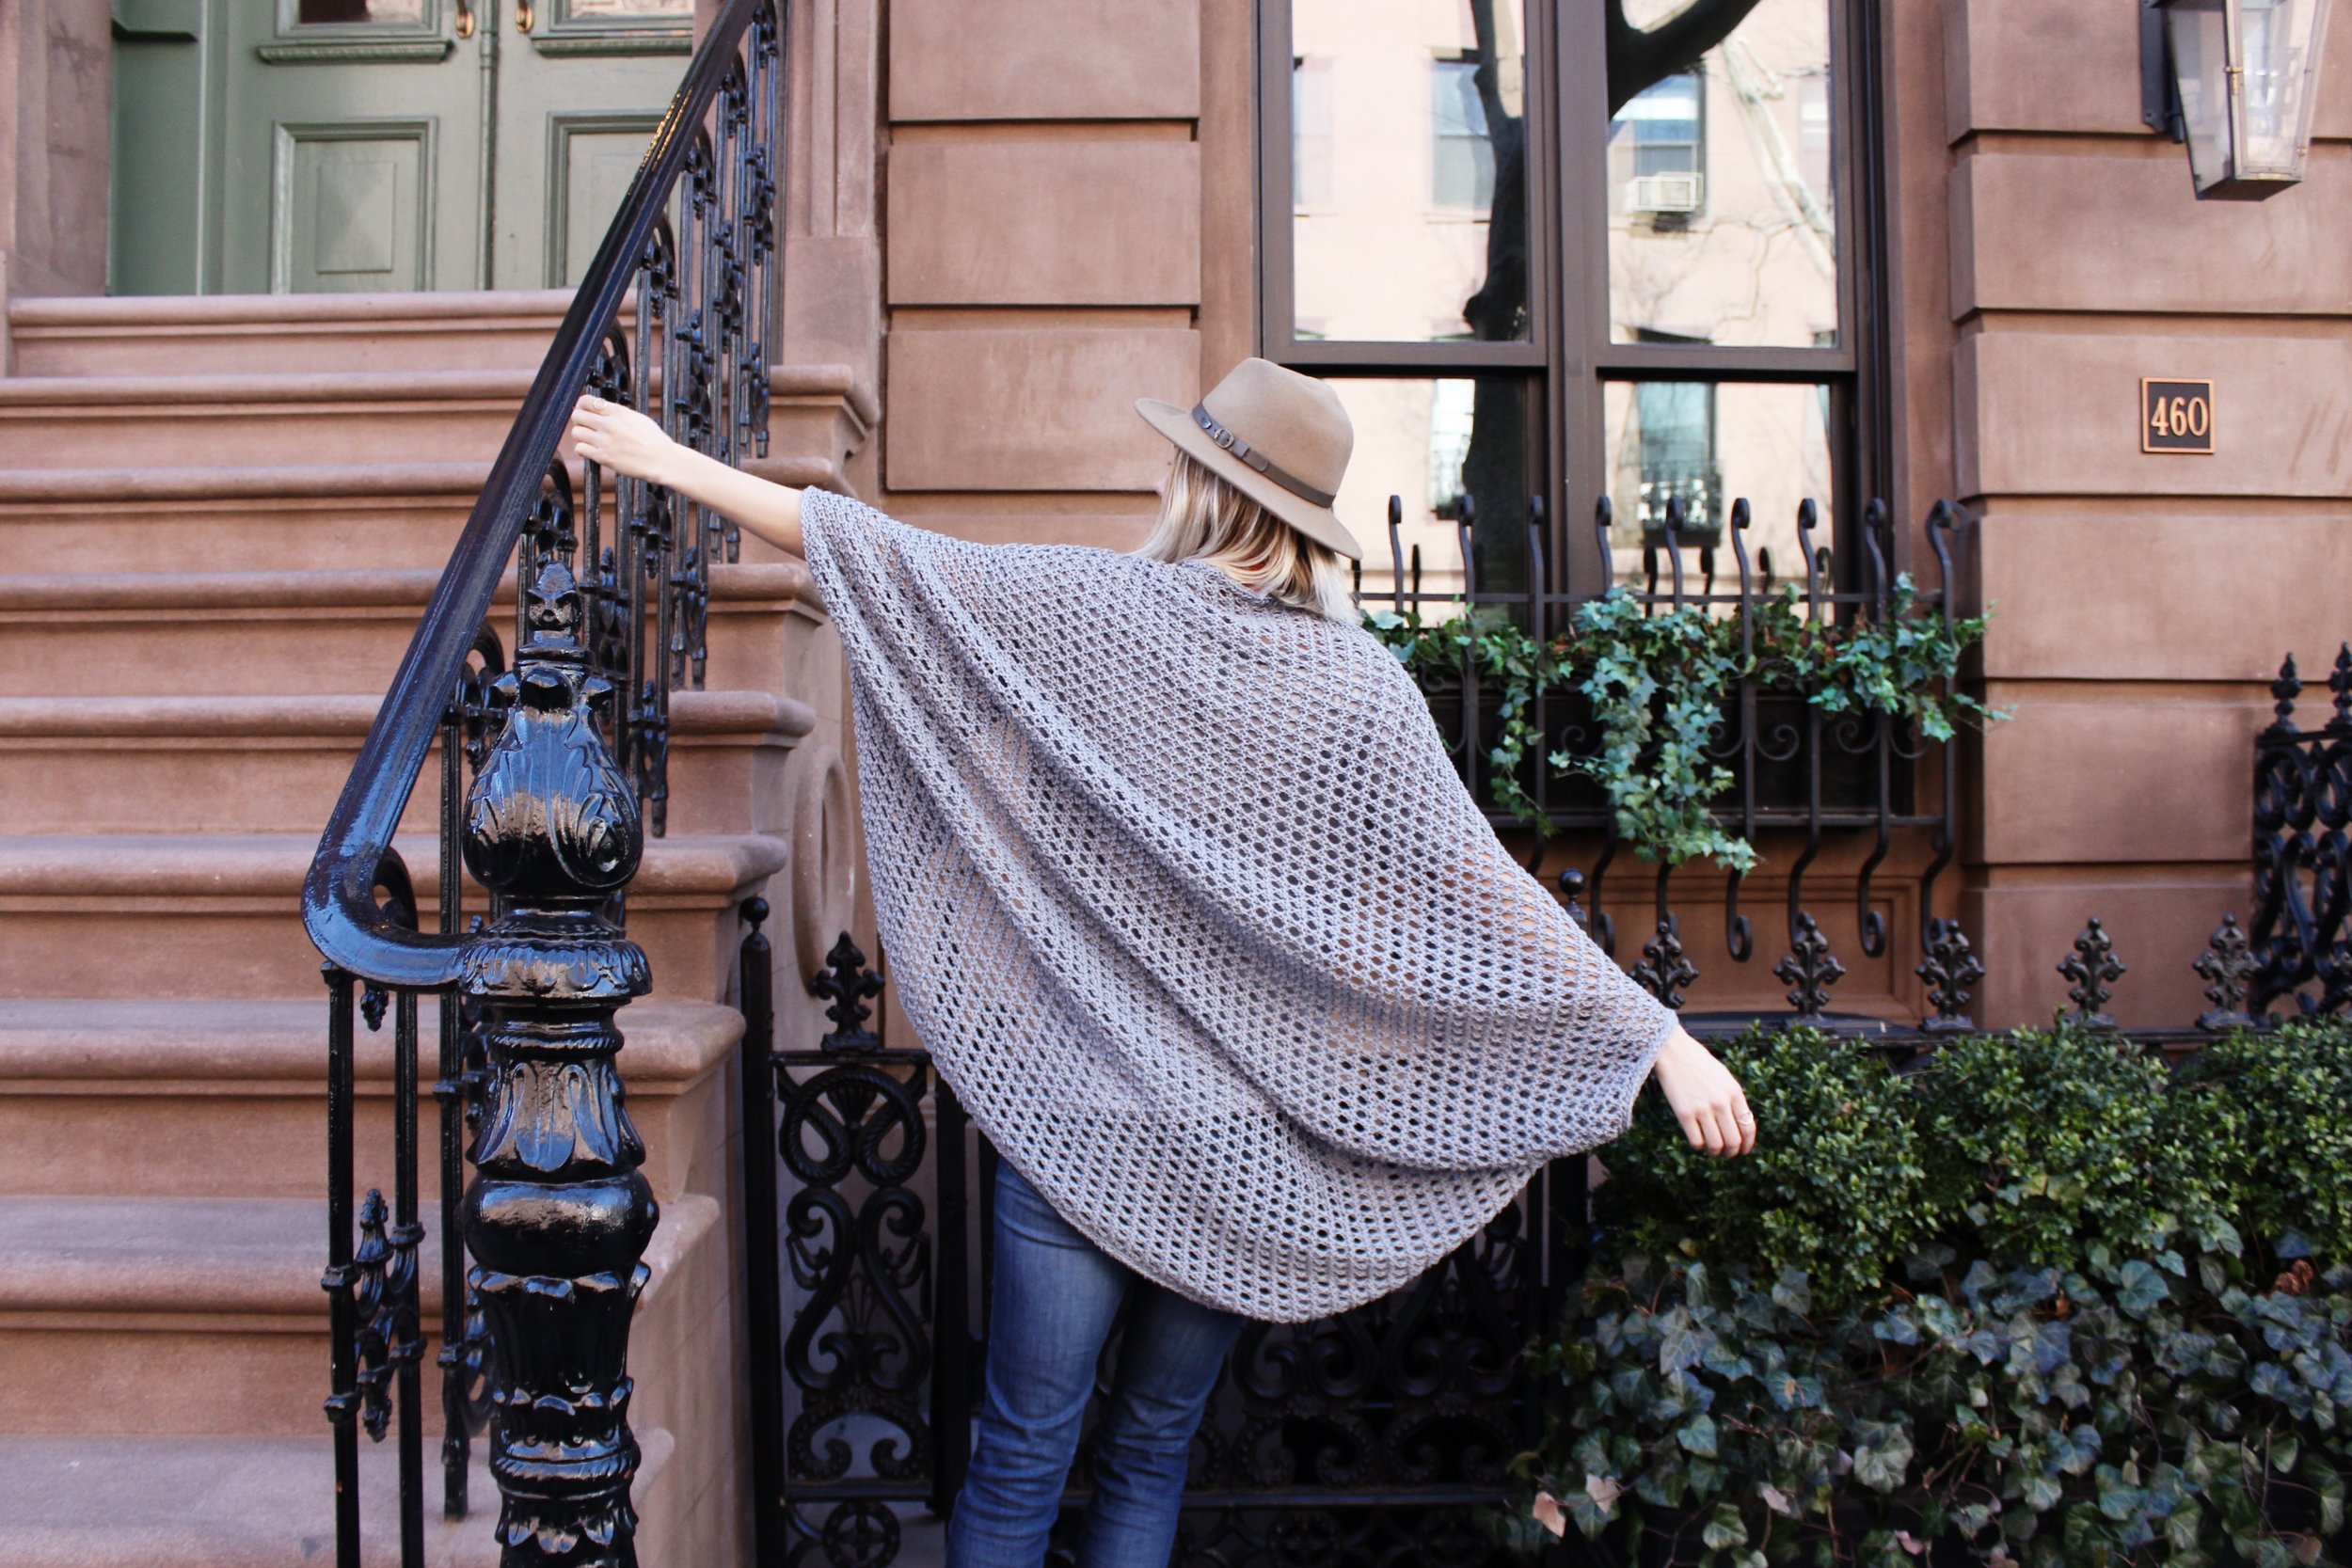
Step into spring with this wonderfully transitional cocoon cardigan — the Chelsea Cape. The lightweight, net-like fabric drapes elegantly and makes the piece perfect for the beach or a stroll through the streets. I designed this piece after an uncountable amount of requests for a knitted version of my Movie Night Cocoon Cardi, and I'm so happy I took the plunge! Just like the Movie Night Cocoon Cardi, this beauty is worked up in Lion Brand 24/7 Cotton. You can find the free pattern below, or click here to purchase a printable, ad-free PDF. Lion Brand has a full kit for sale here with everything you need to complete the project.
There are so many places to get inspired in New York City and one of my favorite spots is the Highline Park, built on an abandoned elevated railway in Chelsea. From the Highline you can see lovely views of the artsy neighborhoods of Chelsea and the Meatpacking District. It's a also a great place to people watch and relax amongst the hustle bustle of the city.
Something about peering down over the energy of the streets below got me thinking about Batman and his sweeping cape that trailed behind him as he looked over Gotham. I imagined a more flowy version of the Movie Night Cocoon Cardi that would blow in the breeze a bit more. Knitting is naturally a looser, more drapable fabric than crochet already, but I chose to expand the dimensions of the garment as well to make it extra flowy.


MATERIALS:
6 skeins Lion Brand 24/7 Cotton in Silver or approx. 1116yds/1020m of another worsted weight, cat. 4 yarn
Size US 10 (6mm) circular knitting needles, 29”/75cm or longer
Size US 10 (6mm) double pointed needles
Tapestry needle
FINISHED SIZE:
Width: 40”/102cm
Length: 44”/112cm
GAUGE:
15 sts + 28 rows = 4”/10cm in pattern (unblocked)
12 sts + 24 rows = 4”/10cm in pattern (blocked)
ABBREVIATIONS:
*All Two of Wands patterns are written in standard US terms*
CO - Cast on
K - Knit
K2tog - Knit 2 together
P - Purl
Rep - Repeat
RS - Right side
Sl - Slip
St(s) - Stitch(es)
YO - Yarn over
Wyib - With yarn in back
Wyif - With yarn in front
Note: Reaching proper gauge for this project is important in order to achieve proper drape. Measure gauge before and after blocking. If it does not match you may need to adjust your needle size to reach it. Wrap is worked side to side in a rectangle which is folded in half and seamed partly up the sides to form the armholes. All stitches are slipped purlwise. A ribbed selvedge edge is worked along the sides to make picking up stitches for the edging easier. Edging is created with an attached i-cord around body and armholes.
With circular needles, CO 131 sts.
Row 1 (RS): Sl 1 wyib, K 1, P 1, K to last 3 sts, P 1, K 2.
Row 2: Sl 1 wyif, P 1, K to last 2 sts, P 2.
Row 3: Sl 1 wyib, K 1, P 1, K to last 3 sts, P 1, K 2.
Row 4: Sl 1 wyif, P 1, K 1, *K2tog, YO, rep from * to last 4 sts, K 2, P 2.
Row 5: Sl 1 wyib, K 1, P 1, K to last 3 sts, P 1, K 2.
Row 6: Sl 1 wyif, P 1, K to last 2 sts, P 2.
Row 7: Sl 1 wyib, K 1, P 1, K to last 3 sts, P 1, K 2.
Row 8: Sl 1 wyif, P 1, K 2, *YO, K2tog, rep from * to last 3 sts, K 1, P 2.
Row 9: Sl 1 wyib, K 1, P 1, K to last 3 sts, P 1, K 2.
Row 10: Sl 1 wyif, P 1, K to last 2 sts, P 2.
Row 11: Sl 1 wyib, K 1, P 1, K to last 3 sts, P 1, K 2.
Rep rows 4-11 until work measures 34”/86cm when laying flat (unblocked).
Bind off. Block work. Fold in half horizontally so that the cast on and bind off edges are halved and the fold line is perpendicular to them. The piece should measure approx. 40”/102cm wide x 22”/ 56cm tall.
Seam up 14”/36cm on each side from the bottom edges up toward the fold line. The 8”/20cm spaces left un-seamed become the armholes.
EDGING:
Edging is created with an attached i-cord that is worked around the outer edge of the cape into the selvedge edge sts and around the armholes into the cast on and bind off sts.
Using two double pointed needles, CO 5 sts, leaving a long tail. Slide sts to other end of needle (working yarn will be at the bottom of the sts). Bring the yarn around the back and knit 4 sts. Slip the last st wyib purlwise.
Starting along the outer edge at one side seam with the right side of the fabric facing you, insert the needle containing the 5 sts into the first selvedge edge st to the left of the seam and pick up and knit a st into it. Pass the slipped st over the picked up st.
Slide the 5 sts to the other end of the needle. Bring the working yarn around the back, knit 4 sts, and slip the last st wyib purlwise. Pick up and knit a second st into the same selvedge edge st just worked in the last row, then pass the slipped st over it. Continue this process all the way around the outer edge of the cape. Each selvedge edge st will be worked into twice. Once you have gone all the way around the outer edge, graft the sts to the cast on edge of the i-cord using the long cast on tail.
To work the attached i-cord around the armholes, CO 4 sts, leaving a long tail. Slide sts to other end of needle (working yarn will be at the bottom of the sts). Bring the yarn around the back and knit 3 sts. Slip the last st wyib purlwise.
Starting along one armhole edge at the side seam with the right side of the fabric facing you, insert the needle containing the 4 sts into the first st to the left of the seam and pick up and knit a st into it. Pass the slipped st over the picked up st. Continue this process all the way around the armhole, working into each st only once this time. Once you have gone all the way around, graft the sts to the cast on edge of the i-cord using the long cast on tail. Repeat for other armhole.
Secure and weave in all ends.
Purchase the printable, ad-free pattern here.
Purchase the kit from Lion Brand Yarn here.
Don't forget to share your projects made using Two of Wands patterns on Instagram with the hashtag #crewofwands to get featured on my page and be in the running for monthly pattern giveaways!
Check out the #crewofwands community page here.
The patterns and photographs of items on this site are the property of Two of Wands and are for personal, non-commercial use only. These patterns files are protected by US copyright, and you may not distribute or sell them electronically or physically.
Small batch sales of finished pieces made from these patterns are permitted, but seller must use their own photographs and credit must be given to Two of Wands as the designer.