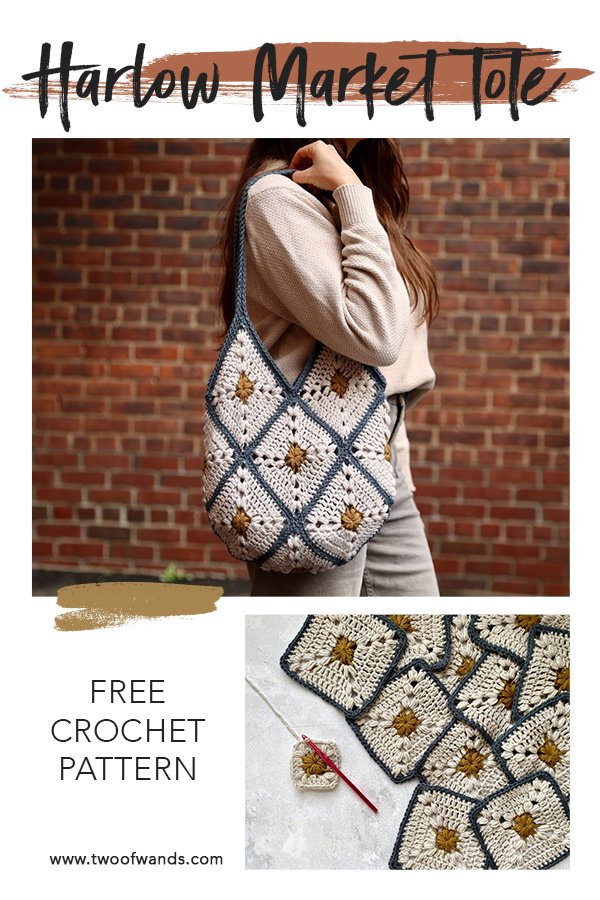
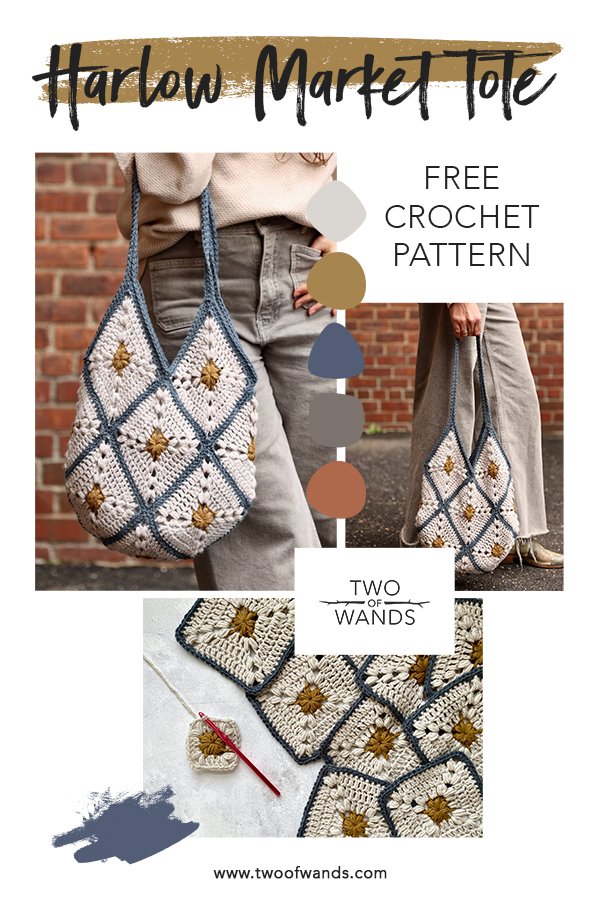
Harlow Market Tote
After designing the Harlow Market Tote for a Joann stitch along earlier this year, I’m so excited to finally be able to offer this pattern as a freebie here on the blog! This project is so customizable and fun to make, and I created a full video tutorial to accompany the pattern as well. Scroll down for the free pattern and links to the videos, purchase a printer-friendly PDF of the pattern here, or purchase the kit with all the yarn you’ll need here.
When Joann reached out to do a stitch along this spring, I knew a crochet bag would be the project to go with. I love how functional they are, and how they make such a great gift (for a loved one, or yourself!). We chose Color Theory for the yarn, and since the palette has so many beautiful color combo options, I knew it would make this bag incredibly personalized and customizable - again, a great attribute for a gift!

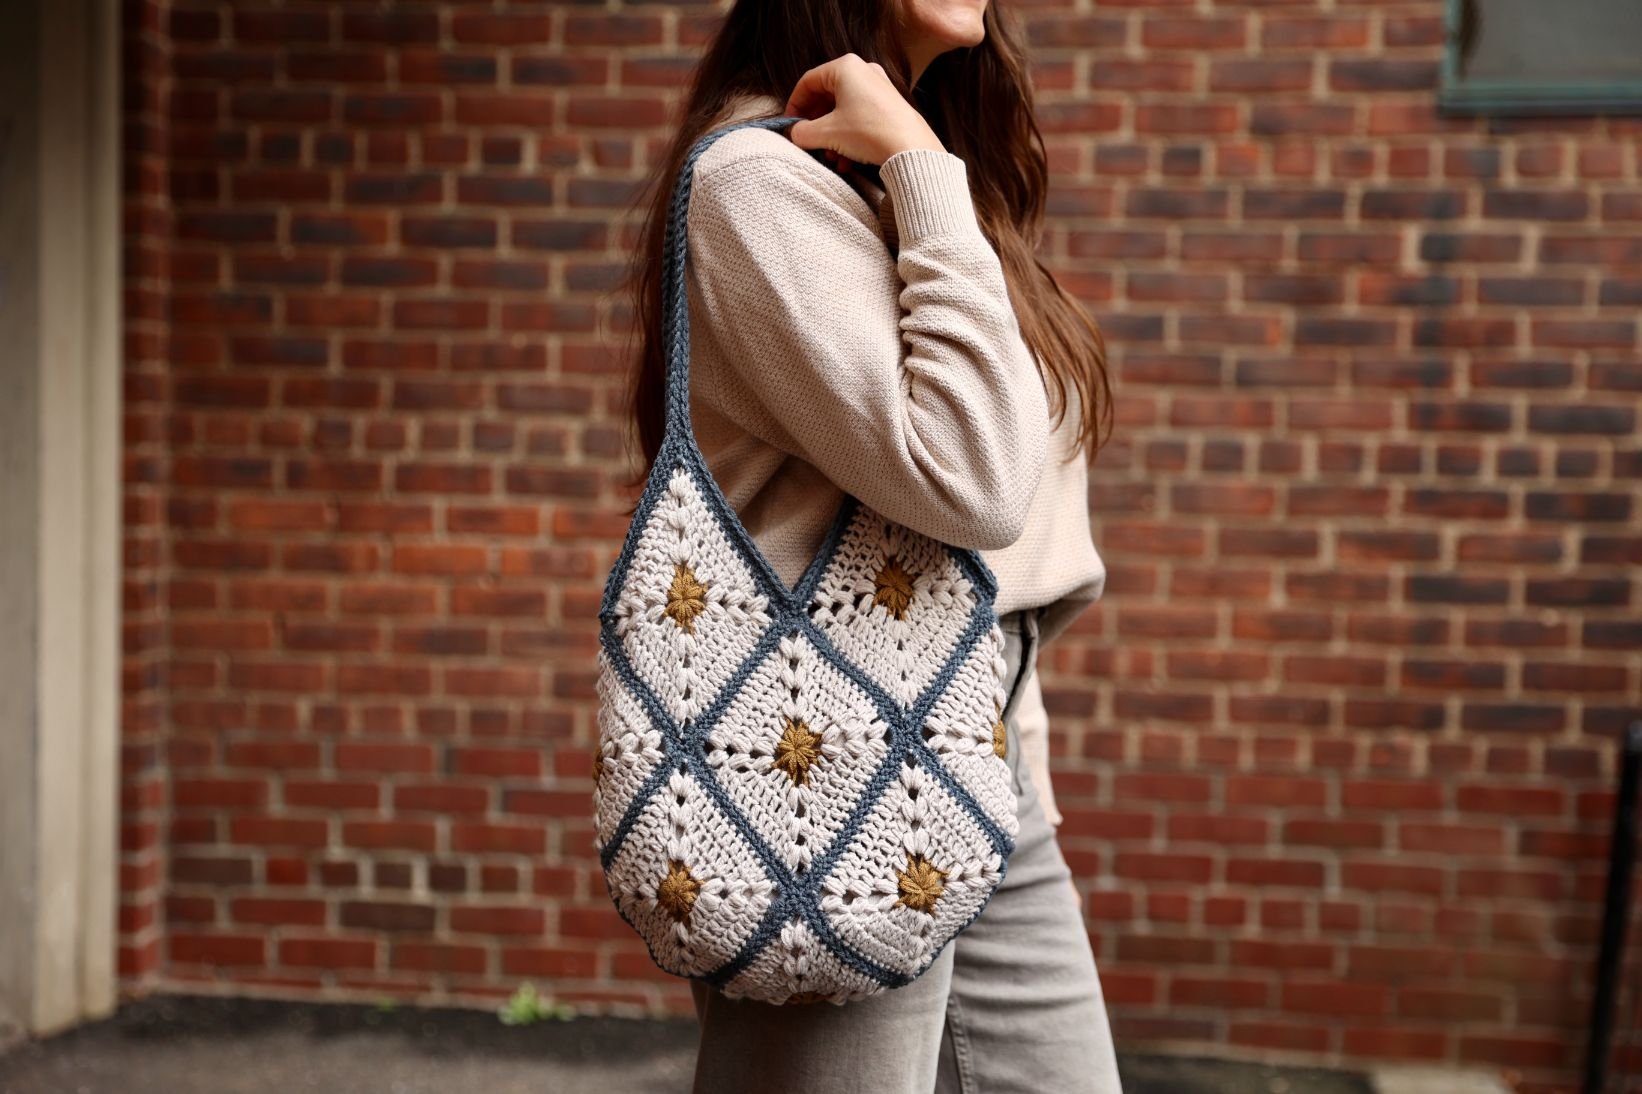
The shape of this bag is one of my favorite styles of crochet bag. Thirteen individual squares get seamed together in a special way to create this rounded-bottom shape with a geometric vibe throughout. I designed each square motif to have a center pop of contrast color with radiating lines of puff stitches that criss cross in a grid over the bag when the squares are seamed. I love with way these lines intersect with and counter balance the second contrast color edging which creates a criss cross lattice pattern over the bag.

The best part about this pattern? I created a full video tutorial to walk you through each step, from making each square, to how to connect them and add the straps. Once you understand the construction and shaping of this bag, you’ll be able to use any square motif you like and connect them in the same way to achieve this style. To view the tutorial, visit these two videos on the Joann YouTube channel:
Part 1 - Making each square

This is an easy level crochet pattern and the techniques involved are double crochet, single crochet, puff stitches, working into chain spaces, working in the round, seaming, and slip stitches.

MATERIALS
1 skein Lion Brand Color Theory in Moonbeam (619-099V) for main color
1 skein Lion Brand Color Theory in Dijon (619-170AE) for contrast color 1
1 skein Lion Brand Color Theory in Stonewash (619-109W) for contrast color 2
(worsted, weight 4; 246yds/225m per skein)
Size I/9 (5.5mm) crochet hook
Tapestry needle
GAUGE
1 square motif = 5”/13cm
FINISHED DIMENSIONS
Width: 14”/35.5cm
Length: 14”/35.5cm
Strap Length: 16”/40.5cm
ABBREVIATIONS
*All Two of Wands patterns are written in standard US terms.
CC – contrast color
Ch – chain
Ch-sp – chain space
Dc – double crochet
MC – main color
PS – puff stitch
Rep – repeat
Rnd(s) – round(s)
RS – right side
Sc – single crochet
Sl st – slip stitch
Sp – space
St(s) – stitch(es)
WS – wrong side

STITCH EXPLANATION:
Puff Stitch (PS) – Yarn over, insert hook into space and draw up a loop (3 loops on hook), yarn over, insert hook into space and draw up a loop (5 loops on hook), yarn over, insert hook into space and draw up a loop (7 loops on hook), yarn over and draw through all loops on hook, ch 1 (this ch 1 will serve as the top of the puff stitch). Note that an extra ch is created before each PS.

Notes: Bag is made of 13 individual squares which are sewn together to form the shape. Strap is crocheted onto bag after construction. Squares are worked in the round with the right side facing. To change color, work the final slip stitch of the previous round with the new color. The ch 2 at each corner is in addition to the ch 1 that closes the puff stitch.
Squares (make 13):
With CC1, begin with a magic loop.
Rnd 1 (RS): Working into the ring, ch 1, PS, ch 2, (PS 2, ch 2) 3 times, PS, sl st to top of 1st PS to join. (8 PS + 4 ch-2 sp)
Change to MC.
Rnd 2: Sl st into next corner ch-2 sp, ch 1, *(PS, ch 2, PS) in corner ch-2 sp, dc in next PS, dc in sp before next PS, dc in next PS, rep from * around, sl st to top of 1st PS to join. (2 PS + 3 dc per side; 8 PS + 12 dc + 4 ch-2 sp total)
Rnd 3: Sl st into next corner ch-2 sp, ch 1, *(PS, ch 2, PS) in corner ch-2 sp, dc in next PS, dc in sp before next dc, dc in each of next 3 dc, dc in sp before next PS, dc in next PS, rep from * around, sl st to top of 1st PS to join. (2 PS + 7 dc per side; 8 PS + 28 dc + 4 ch-2 sp total)
Rnd 4: Sl st into next corner ch-2 sp, ch 1, *(PS, ch 2, PS) in corner ch-2 sp, dc in next PS, dc in sp before next dc, dc in each of next 7 dc, dc in sp before next PS, dc in next PS, rep from * around, sl st to top of 1st PS to join. (2 PS + 11 dc per side; 8 PS + 44 dc + 4 ch-2 sp total)
Change to CC2.
Rnd 5: Sl st into next corner ch-2 sp, ch 1, *sc 4 in corner ch-2 sp, sc in next PS, sc in sp before next dc, sc in each of next 11 dc, sc in sp before next PS, sc in next PS, rep from * around, sl st to top of 1st sc to join. (19 sc per side; 76 sc total)
Fasten off. Secure and weave in all ends.

Construction:
Lightly block all squares to 5”/13cm to ensure a perfect fit. Using a whip stitch or seaming technique of your choice, seam the squares together in the configuration illustrated below with CC2. Fold squares 12 and 13 up to meet squares 1 and 2. Square 8 will be folded in half horizontally. Using the colors and letters on the configuration as a guide, seam side A to side B, side C to side D, side E to side F, and so on. Squares 3 and 5 will be folded in half vertically.
Secure and weave in all ends.

Outer edging and straps:
With CC2 and front of bag (squares 1, 2, 4, 6, 7) facing up, rejoin yarn in the 1st available st along the right side edge of square 2.
Rnd 1: Ch 1 and starting in same st as join, sc 19 up the right side edge of square 2 (last sc should be in the 2nd of the 4 corner sts at the top of square 2), ch 60 for front strap, then starting in the 3rd corner st at the top of square 1, sc 19 down the left side edge of square 1, sc2tog into the corner to close up the gap, sc 19 up the right side edge of square 12 (last sc should be in the 2nd of the 4 corner sts at the top of square 12), ch 60 for back strap, then starting in the 3rd corner st at the top of square 13, sc 19 down the left side edge of square 13, sc2tog into the corner to close up the gap. Do not join.
Rnd 2: Sc around.
Fasten off. With front of bag facing up, rejoin yarn in the 3rd corner st at the top of square 2 (the 1st st available along the left side edge of square 2).
Rnd 3: Ch 1 and starting in the same st as join, sc 19 down the left side edge of square 2, sc2tog into the corner to close up the gap, sc 19 up the right side edge of square 1, then sc into the underside of each ch that formed the strap. Do not join.
Rnd 4: Sc around.
Fasten off. Rep rounds 3 and 4 on back of bag along squares 12 and 13 and opposite strap.
Secure and weave in any remaining ends.
Purchase the printable, ad-free pattern here.
Purchase the kit from Lion Brand here.
Don't forget to share your projects made using Two of Wands patterns on Instagram with the hashtag #crewofwands to get featured on my page and be in the running for monthly pattern giveaways!
Join the Crew of Wands Facebook group to connect with other makers of Two of Wands patterns for help with techniques and pattern related questions.
The patterns and photographs of items on this site are the property of Two of Wands and are for personal, non-commercial use only. These patterns files are protected by US copyright, and you may not distribute or sell them electronically or physically. Small batch sales of finished pieces made from these patterns are permitted, but seller must use their own photographs and credit must be given to Two of Wands as the designer.